
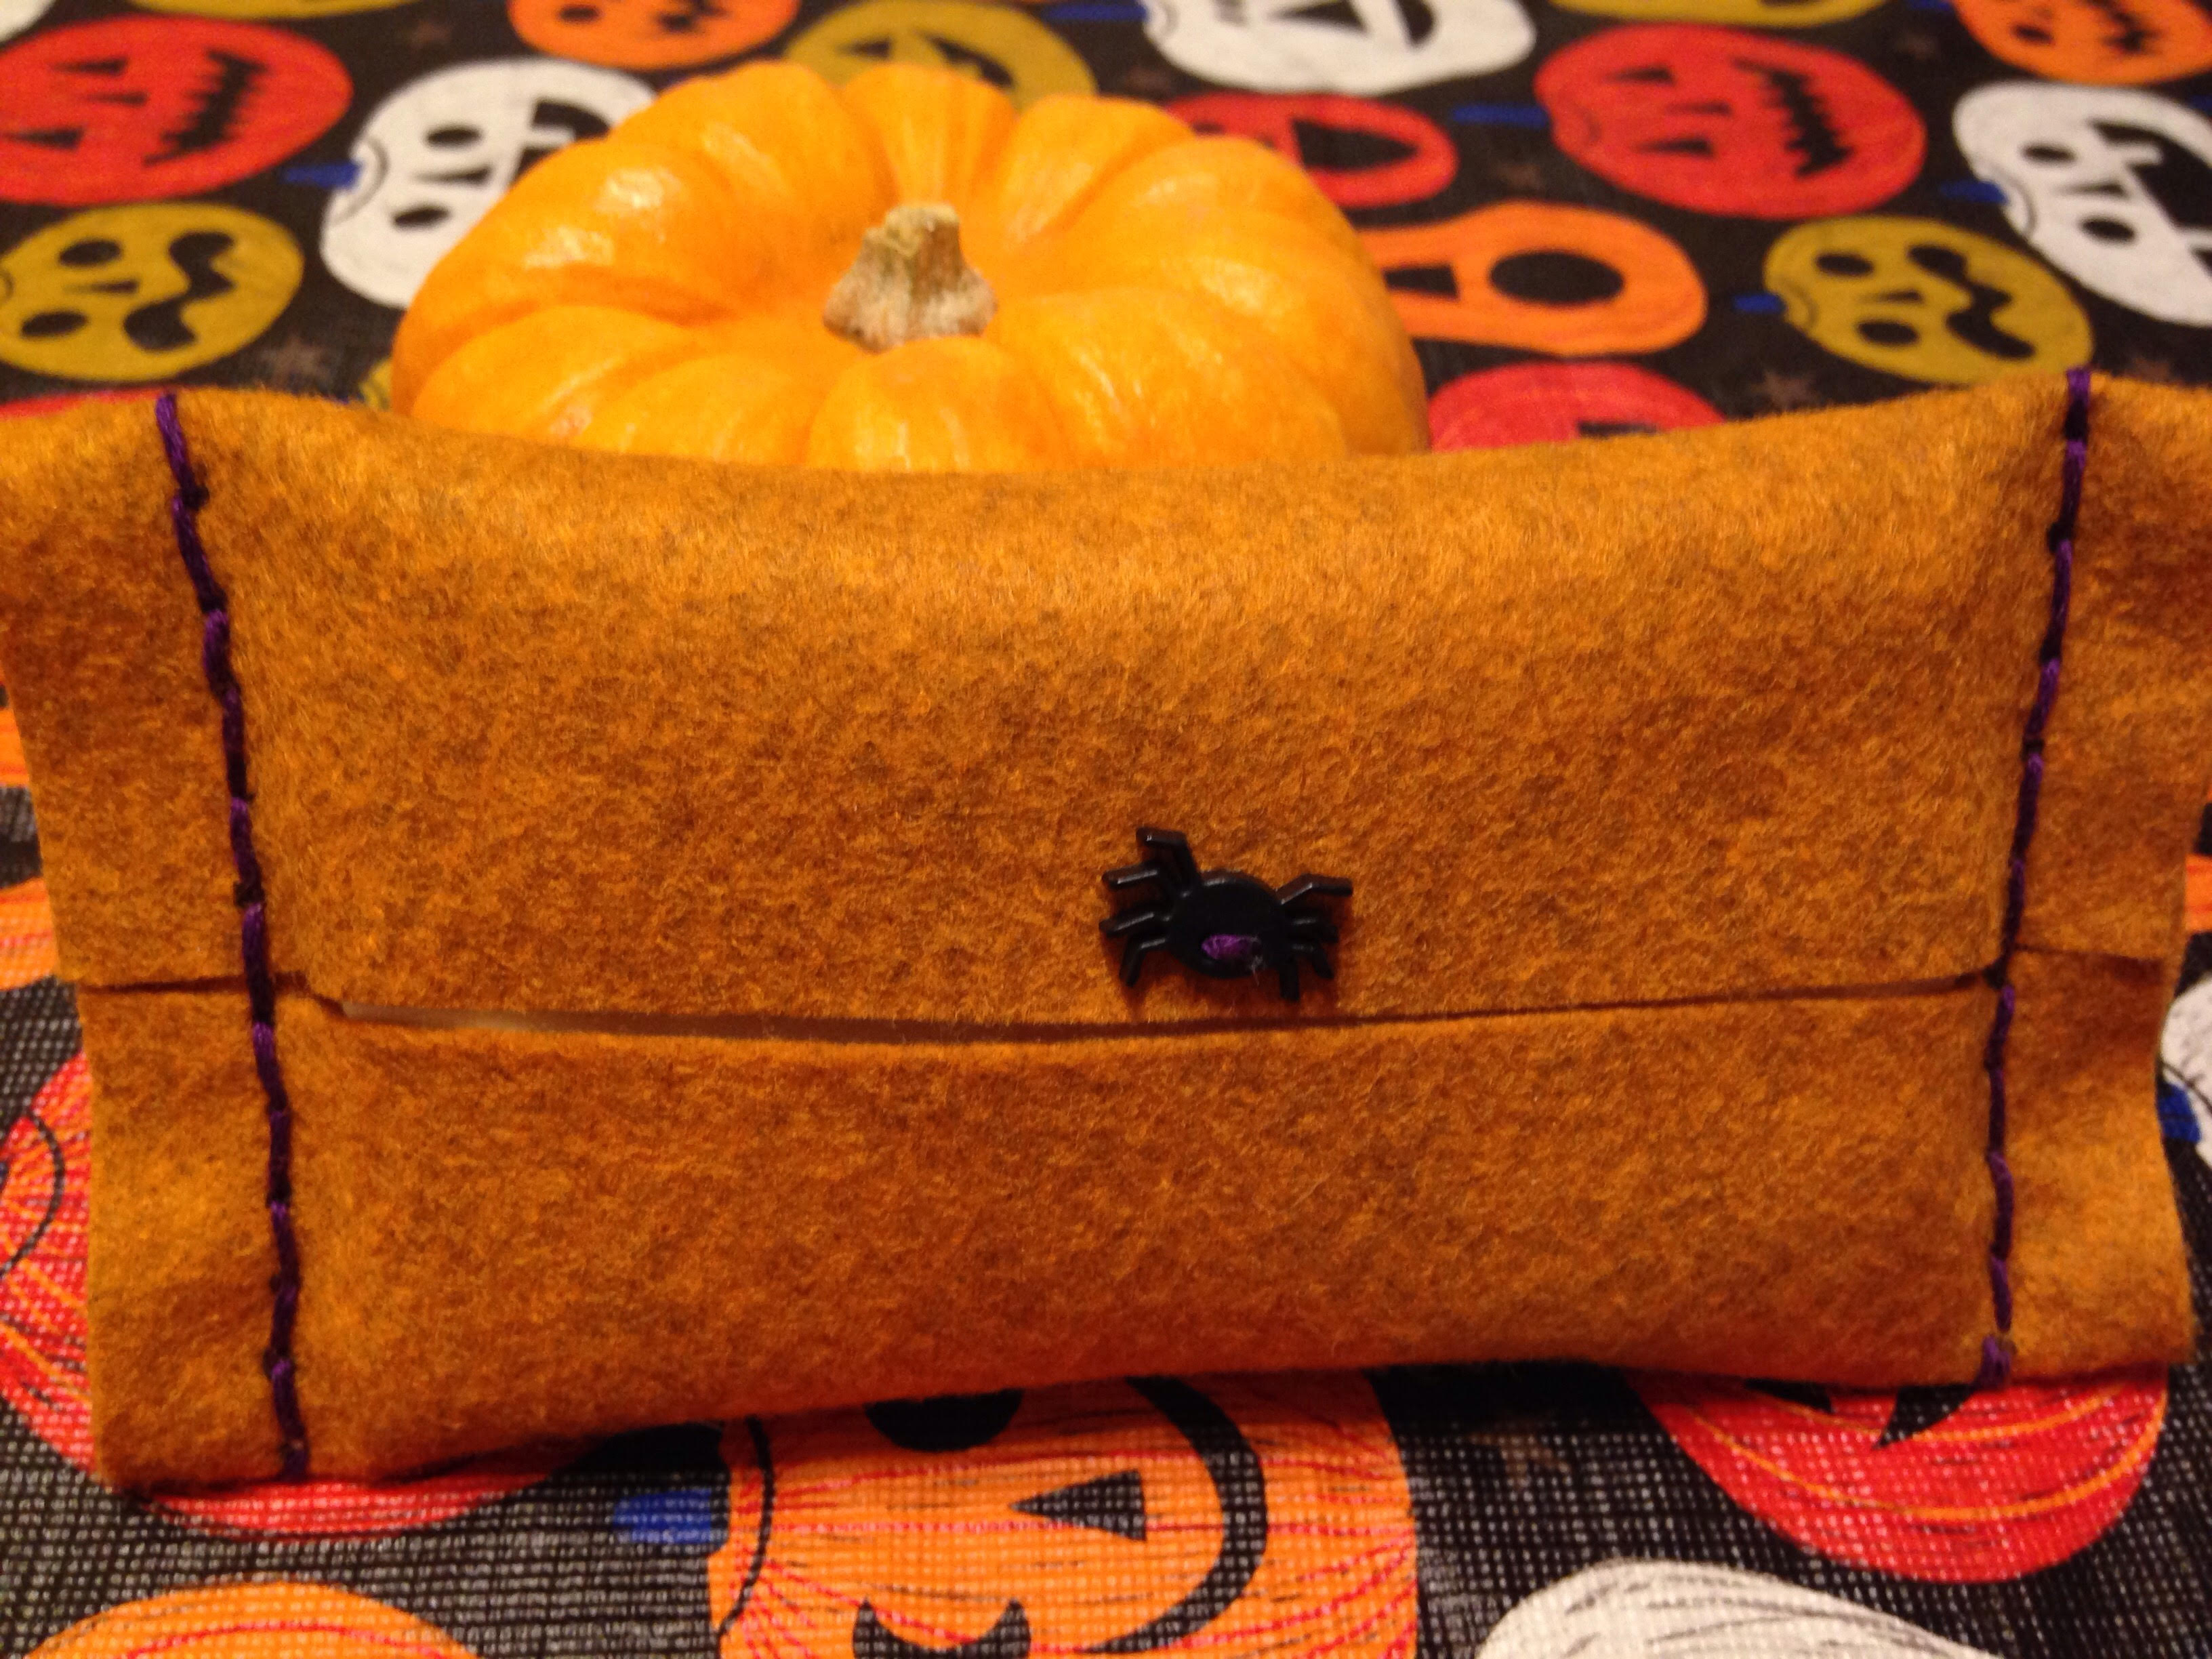
Ok gang! I’m comin’ at ya with a super simple DIY today…but it was just too cute not to share!!!
It’s no secret that I love podcasts. I listen to them while I do my chores and when I go on walks. But sometimes, ya girl wants to binge listen. And when I binge listen to a podcast, I need something to do with my hands. (Are you the same way?) So the other evening, I wanted to dive into a podcast people have been raving about — Dirty John. And I knew I’d probably get sucked in. Inspired by some gorgeous felt I’d recently purchased, I decided to whip up some autumnal tissue holders as I listened. Perfect for throwing in your purse to combat the change-of-season sniffles, I thought! And the perfect level of difficulty for when your mind is with more pressing matters. Like who the heck this mysterious man, John, really is.
Admittedly, this is a craft suited for an elementary school student…but HEY! It was a great quiet time activity for my true crime binge. If it’s not already obvious how these came together, keep reading and I’ll give ya the deets.
What you’ll need:
- felt, cut into 6×6 squares
- embroidery thread
- pins
- needle
- scissors/pinking shears
- buttons
- tissues
- ruler
- sharpie

And how it all comes together:
Take a 6″ x 6″ square of felt and fold the left and ride side in to the center line. Use pins to secure in place so the folds stay down.
Measure 1/2″ down from the top and make a mark. This is where you’ll sew across. Use a ruler to draw dots across the entire line if you want to make sure to sew in a straight line. (You can eye ball both these steps if you prefer.)
Now choose your embroidery thread and sew the top closed. Make sure to start and end your stitches from the inside of the holder so your knots aren’t visible. Repeat the measuring, line drawing, and sewing on the bottom.

If you have pinking shears (I didn’t have any on hand), you can cut the ends to give it a fancier look!
Finally, finish it off by sewing a cool button or felt shape above the opening.
You’re ready to put the tissues inside! Just get a pack of travel tissues, remove them from their packaging, and stuff ’em in your own (way cooler!) holder.
Finito!

I don’t know what it is about these little guys but I’M OBSESSED. Do you have any fun felt crafts you’d recommend? (I have a whole stack of the stuff!…and more podcasts to listen to!)
P.S. Other DIY’s you might enjoy — Polaroid Display and Fabric Pumpkin.

I love the colors!
Wow! These tissue holder is soo friggin cute! I would seriously try to make this. I have a black felt lying around and some yarn too. I’ll link this post when I finish this project. Good job Beth! ❤
Yay! Can’t wait to see what you come up with!! 🙂
These are so beautiful! The winter has landed in here so I’m pretty much over from Autumn already haha.
They are so beautiful! I love the colors you have chosen, so autumnal and suitable for winter as well! Great work dear!
What a great idea! Finishing up spring and (hopefully) heading into summer soon, will have to keep this DIY in mind for when autumn returns 😊
Those are cute!!! What did you think about Dirty John?? The preview of it creeped me out so I didn’t listen 😦
It’s really good! Very creepy tho. 🙂 Definitely better to listen to indoors while craftin’ than on a walk by yourself in the evening.
Ok, those are incredibly cute and the colours you have chosen could not be more autumnal!
Where did you get the tablecloth? It’s gorgeous!! xx
From Target!