Category Archives: How to’s

Recipe: Hearty Roasted Vegetable Soup

IMG_1747

With the days turning to darkness at such a rapid rate, I’ve been gravitating towards cozy meals. You know the type. Colorful, warming dishes that pack a hearty punch. A dinner gobbled up out of a single bowl clutched to your chest as you curl up in front of your latest Netflix programming.

I love the flavor of roasted veggies in the winter-time. (I also love how they smell while they’re roasting in the oven. Yum!) But I’ve never thought to throw a whole batch of the lil buggers in a soup pot! *light bulb* So, I roasted up some of my favorite vegetables and while they did their thing in the oven, I got to work on the rest of the soup. To up the “heartiness” factor I included a whole bunch of beans. And tied everything together with a tomato-based broth.

The result was a delicious, comforting soup. The vegetables were the perfect consistency swimming around in a slightly spicy, tomato-y bowl. So, I definitely recommend you give this one a try. It was very inexpensive, easy to make, and made enough to eat AND freeze. Here’s how it’s done…

What you’ll need: 

For the roasted veggies…

– 2 bell peppers

– 2 small or 1 large onion

– 2 sweet potatoes

– a handful of baby carrots (or cut up your own, I just always have baby carrots in the fridge)

– minced garlic

– olive oil

– paprika

– chili powder

– salt and pepper

For the rest of the soup…

– 2 cans of diced tomatoes (I used one spicy can and one regular can)

– 1 vegetable stock cube

– black eyed peas

– kidney beans

– butter beans

– 1 Tbsp brown sugar

– mustard

– Worcestershire sauce

and how it all comes together: 

– Pre-heat your oven to 390 degrees F (or whatever temperature you find works best to roast veg in your particular oven).

– Peel the sweet potatoes, chop them into large chunks, and spread them out on your baking tray or roasting dish.

– Add in your carrots.

– Cut up your bell peppers into strips and add them to the tray. Do the same with your onions. (Note: The size of your vegetables may seem large for a soup but they’re all gonna break down a bit once they’ve been added to the pot.)

IMG_1722

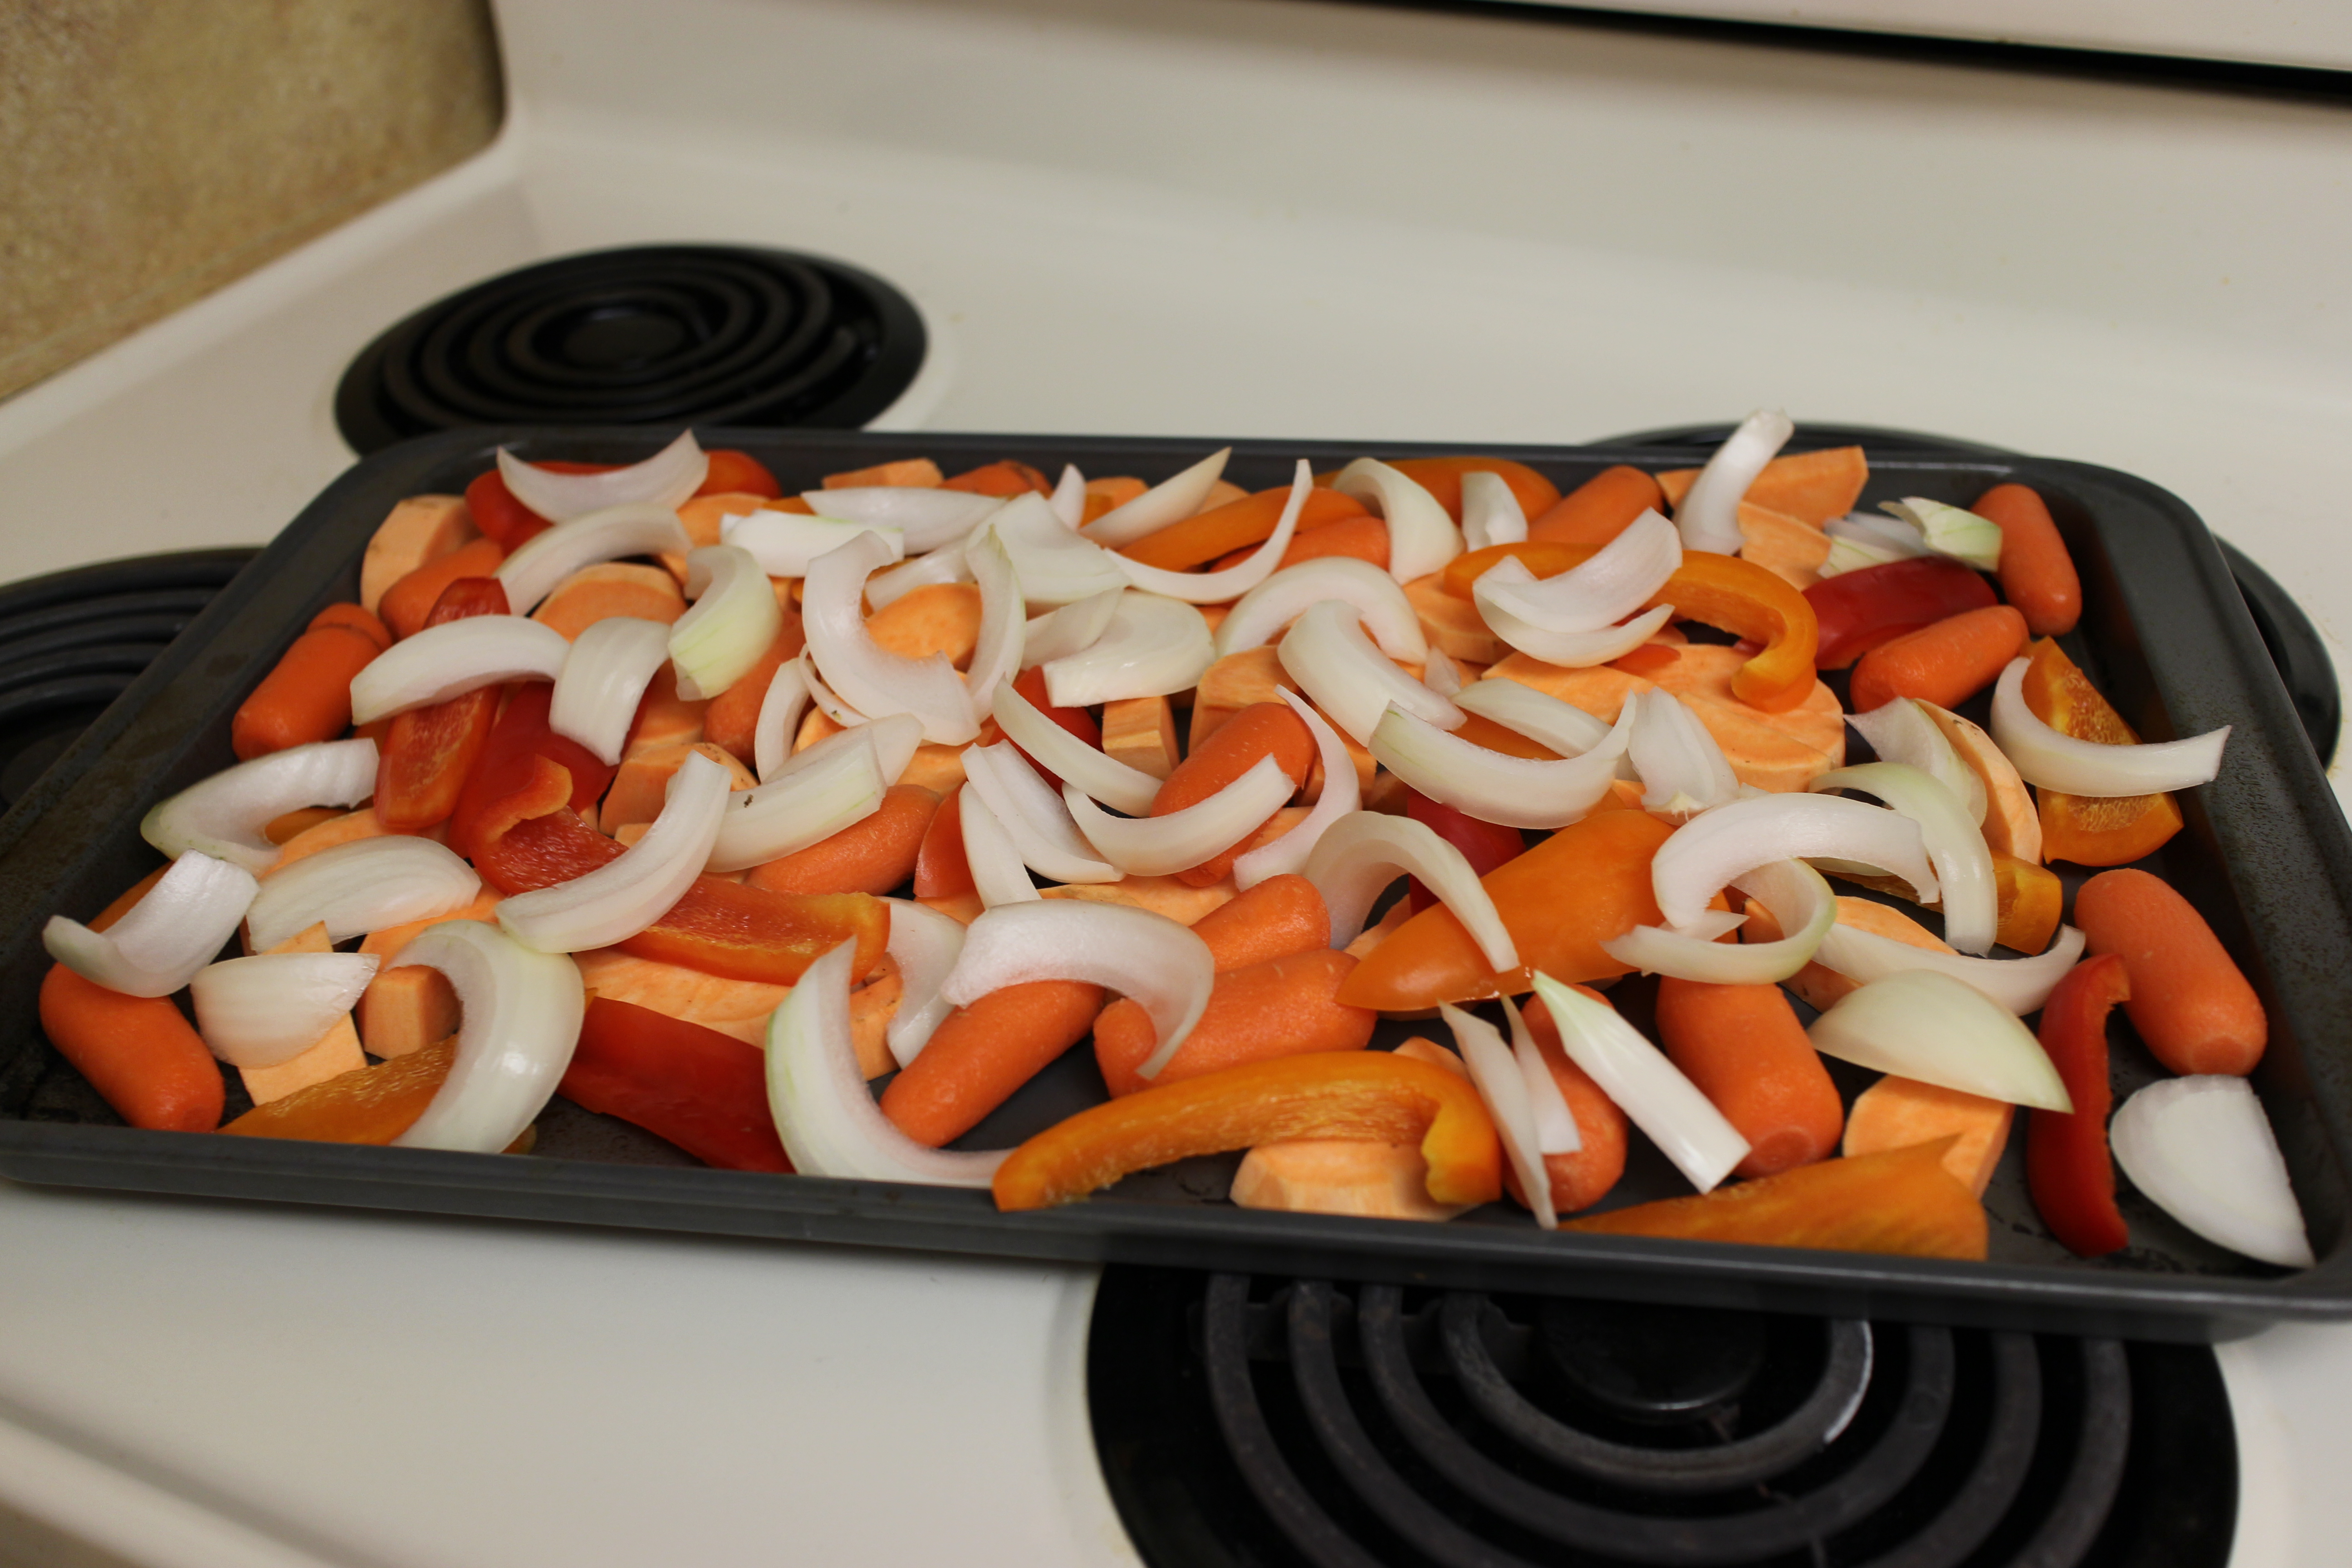
– Add minced garlic to taste.

– Drizzle olive oil over everything and sprinkle on salt, pepper, paprika, and chili powder.

– Toss everything up with your hands.

IMG_1727

– Put the whole kit and kaboodle in the oven for about 30 minutes.

– While these are roasting you can turn to the base of the soup.

– Start by making your vegetable stock according to the directions on the package. (Usually mixing the cube with 2 cups of boiling water.)

IMG_1731

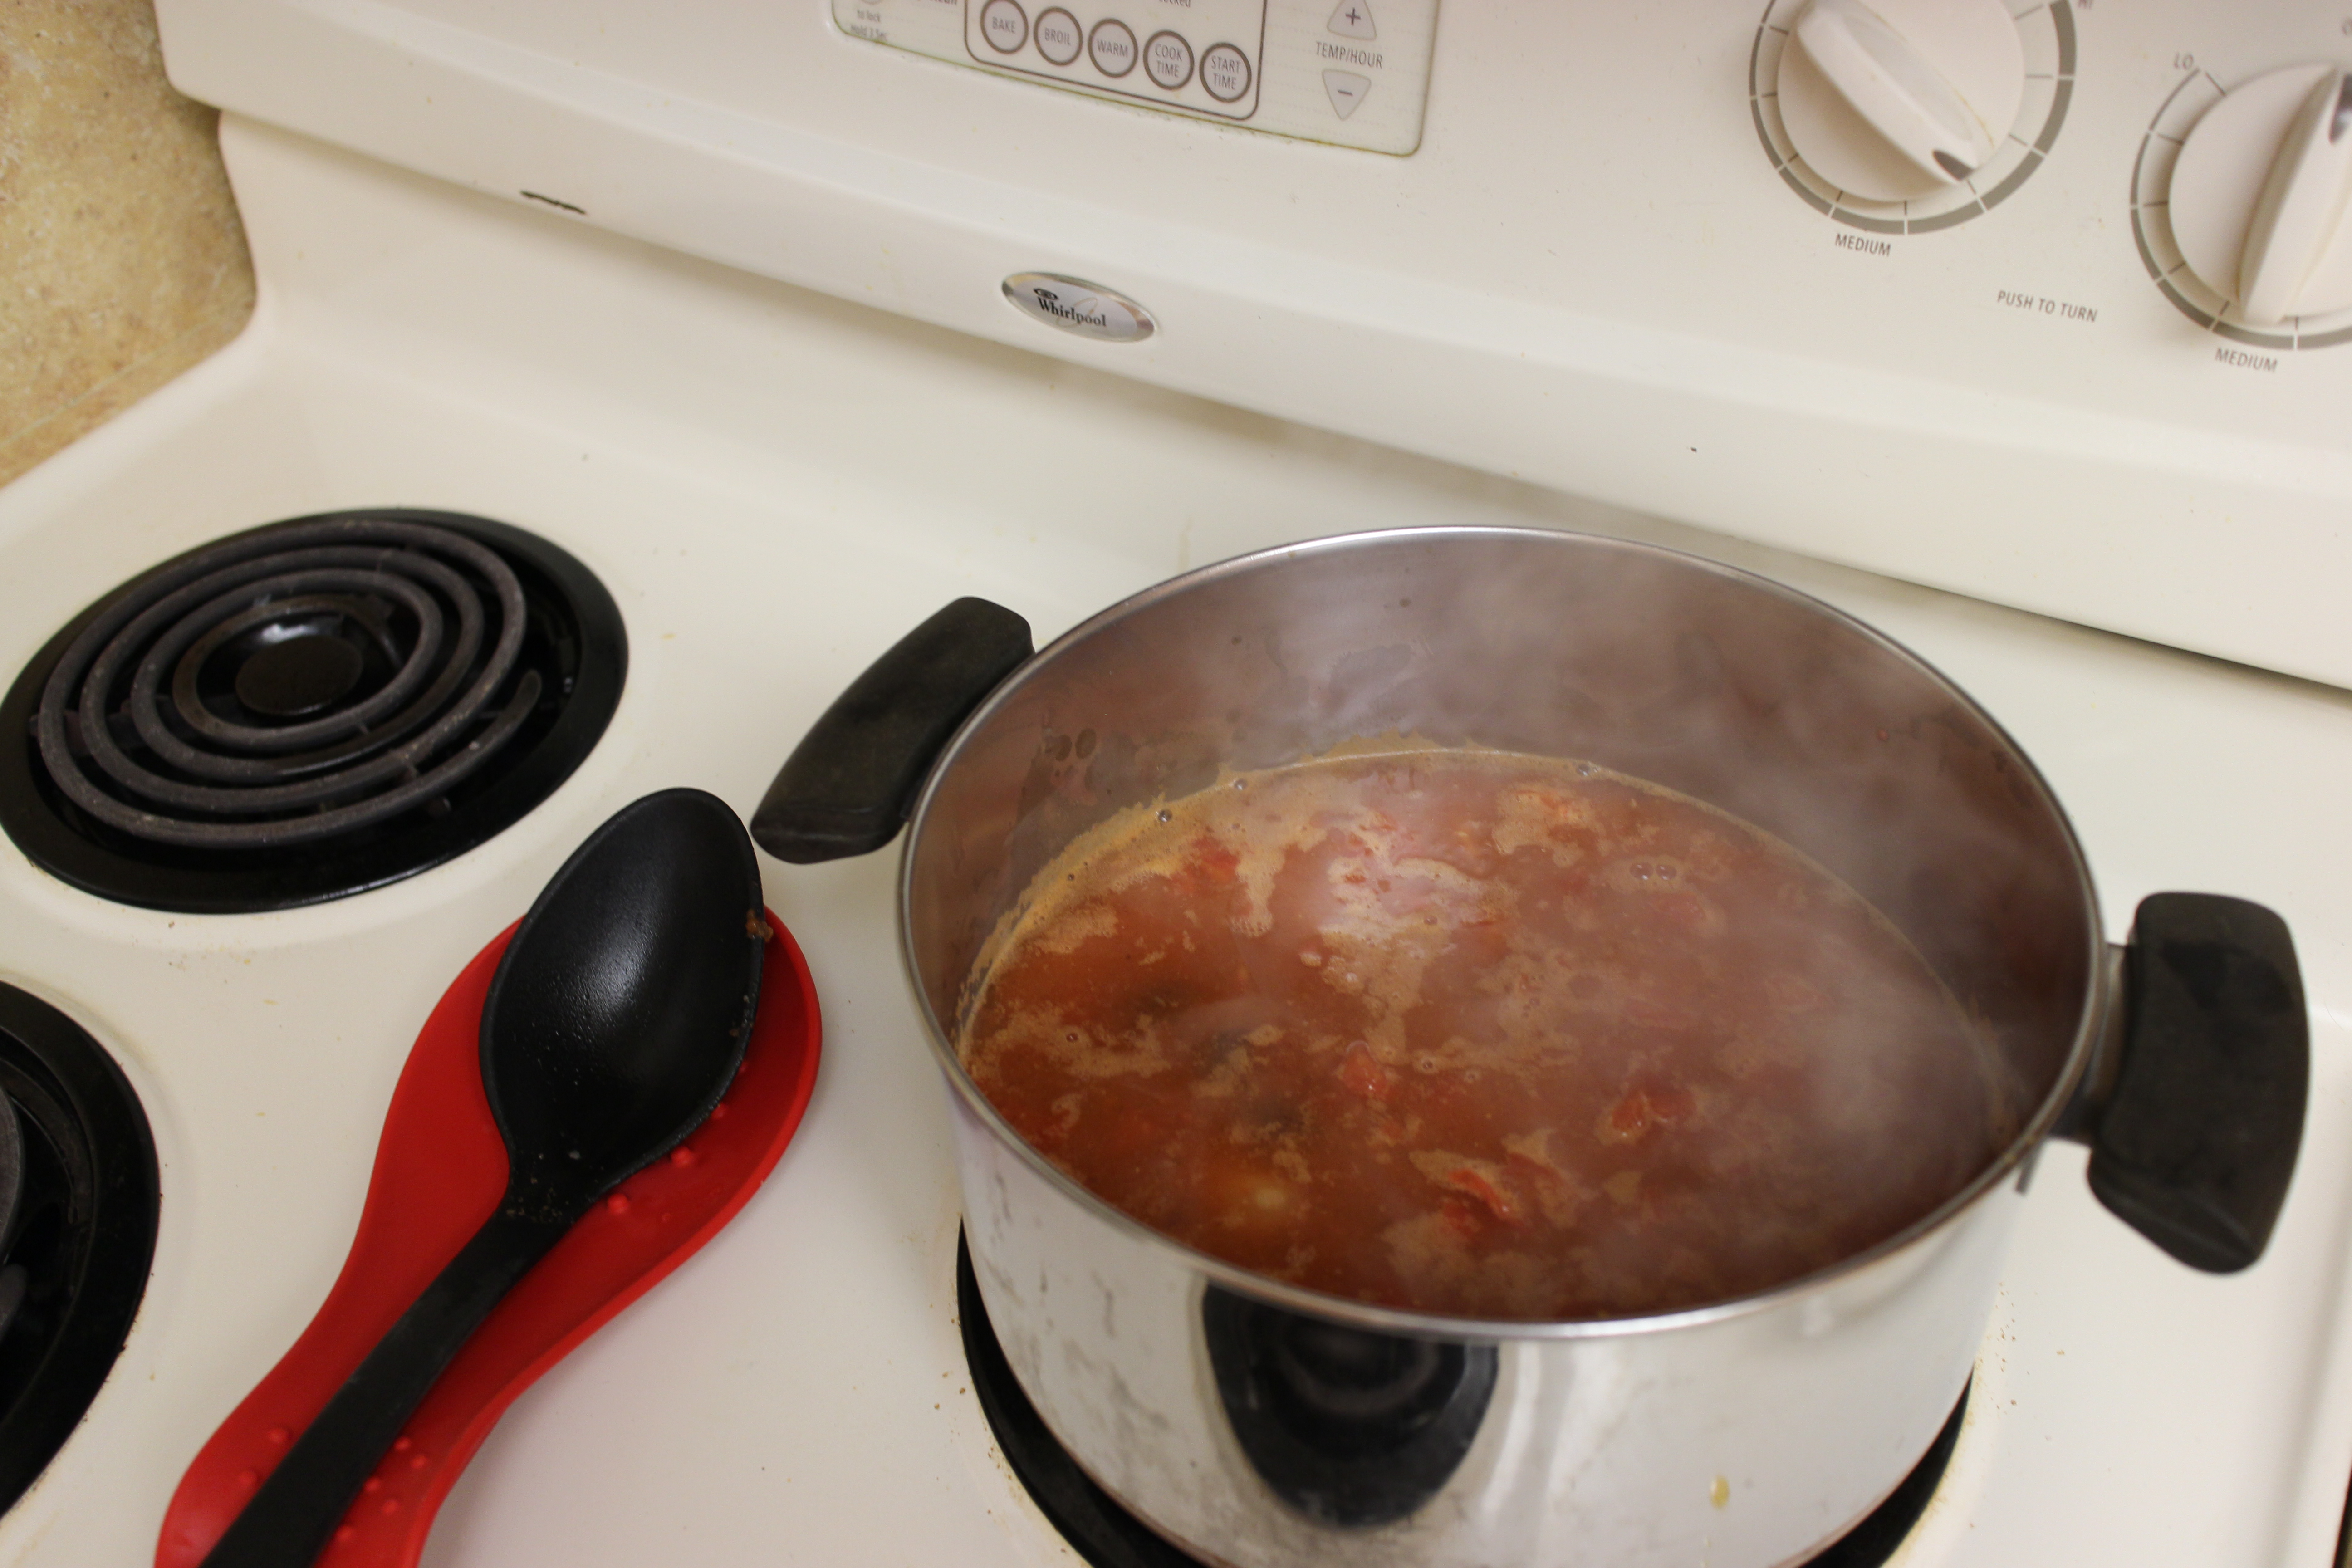
– While you’re waiting for your water to boil for the vegetable stock, grab a large soup pot and add your cans of tomatoes and beans. For the beans you can use whatever type you like. I put a can of blackeyed peas, kidney beans, and butter beans in a strainer. After mixing and rinsing them, I scooped out about 3 cups into the pot. The rest of the bean mixture I put in a Tupperware to store for a later meal.

– Bring your tomatoes and beans to a boil and then reduce the heat to simmer. Then add in 1 Tbsp of brown sugar, a dash of Worcestershire sauce, a squeeze of mustard, and salt and pepper. Give it a good stir.

IMG_1729

– Your vegetable stock should now be ready so pour that in too! Let everything simmer away until your timer goes off for those delicious roasted veggies.

IMG_1732

– Once the veggies look good and roasted, pop them out of the oven…

IMG_1734

– …and put them in the soup pot!

IMG_1738

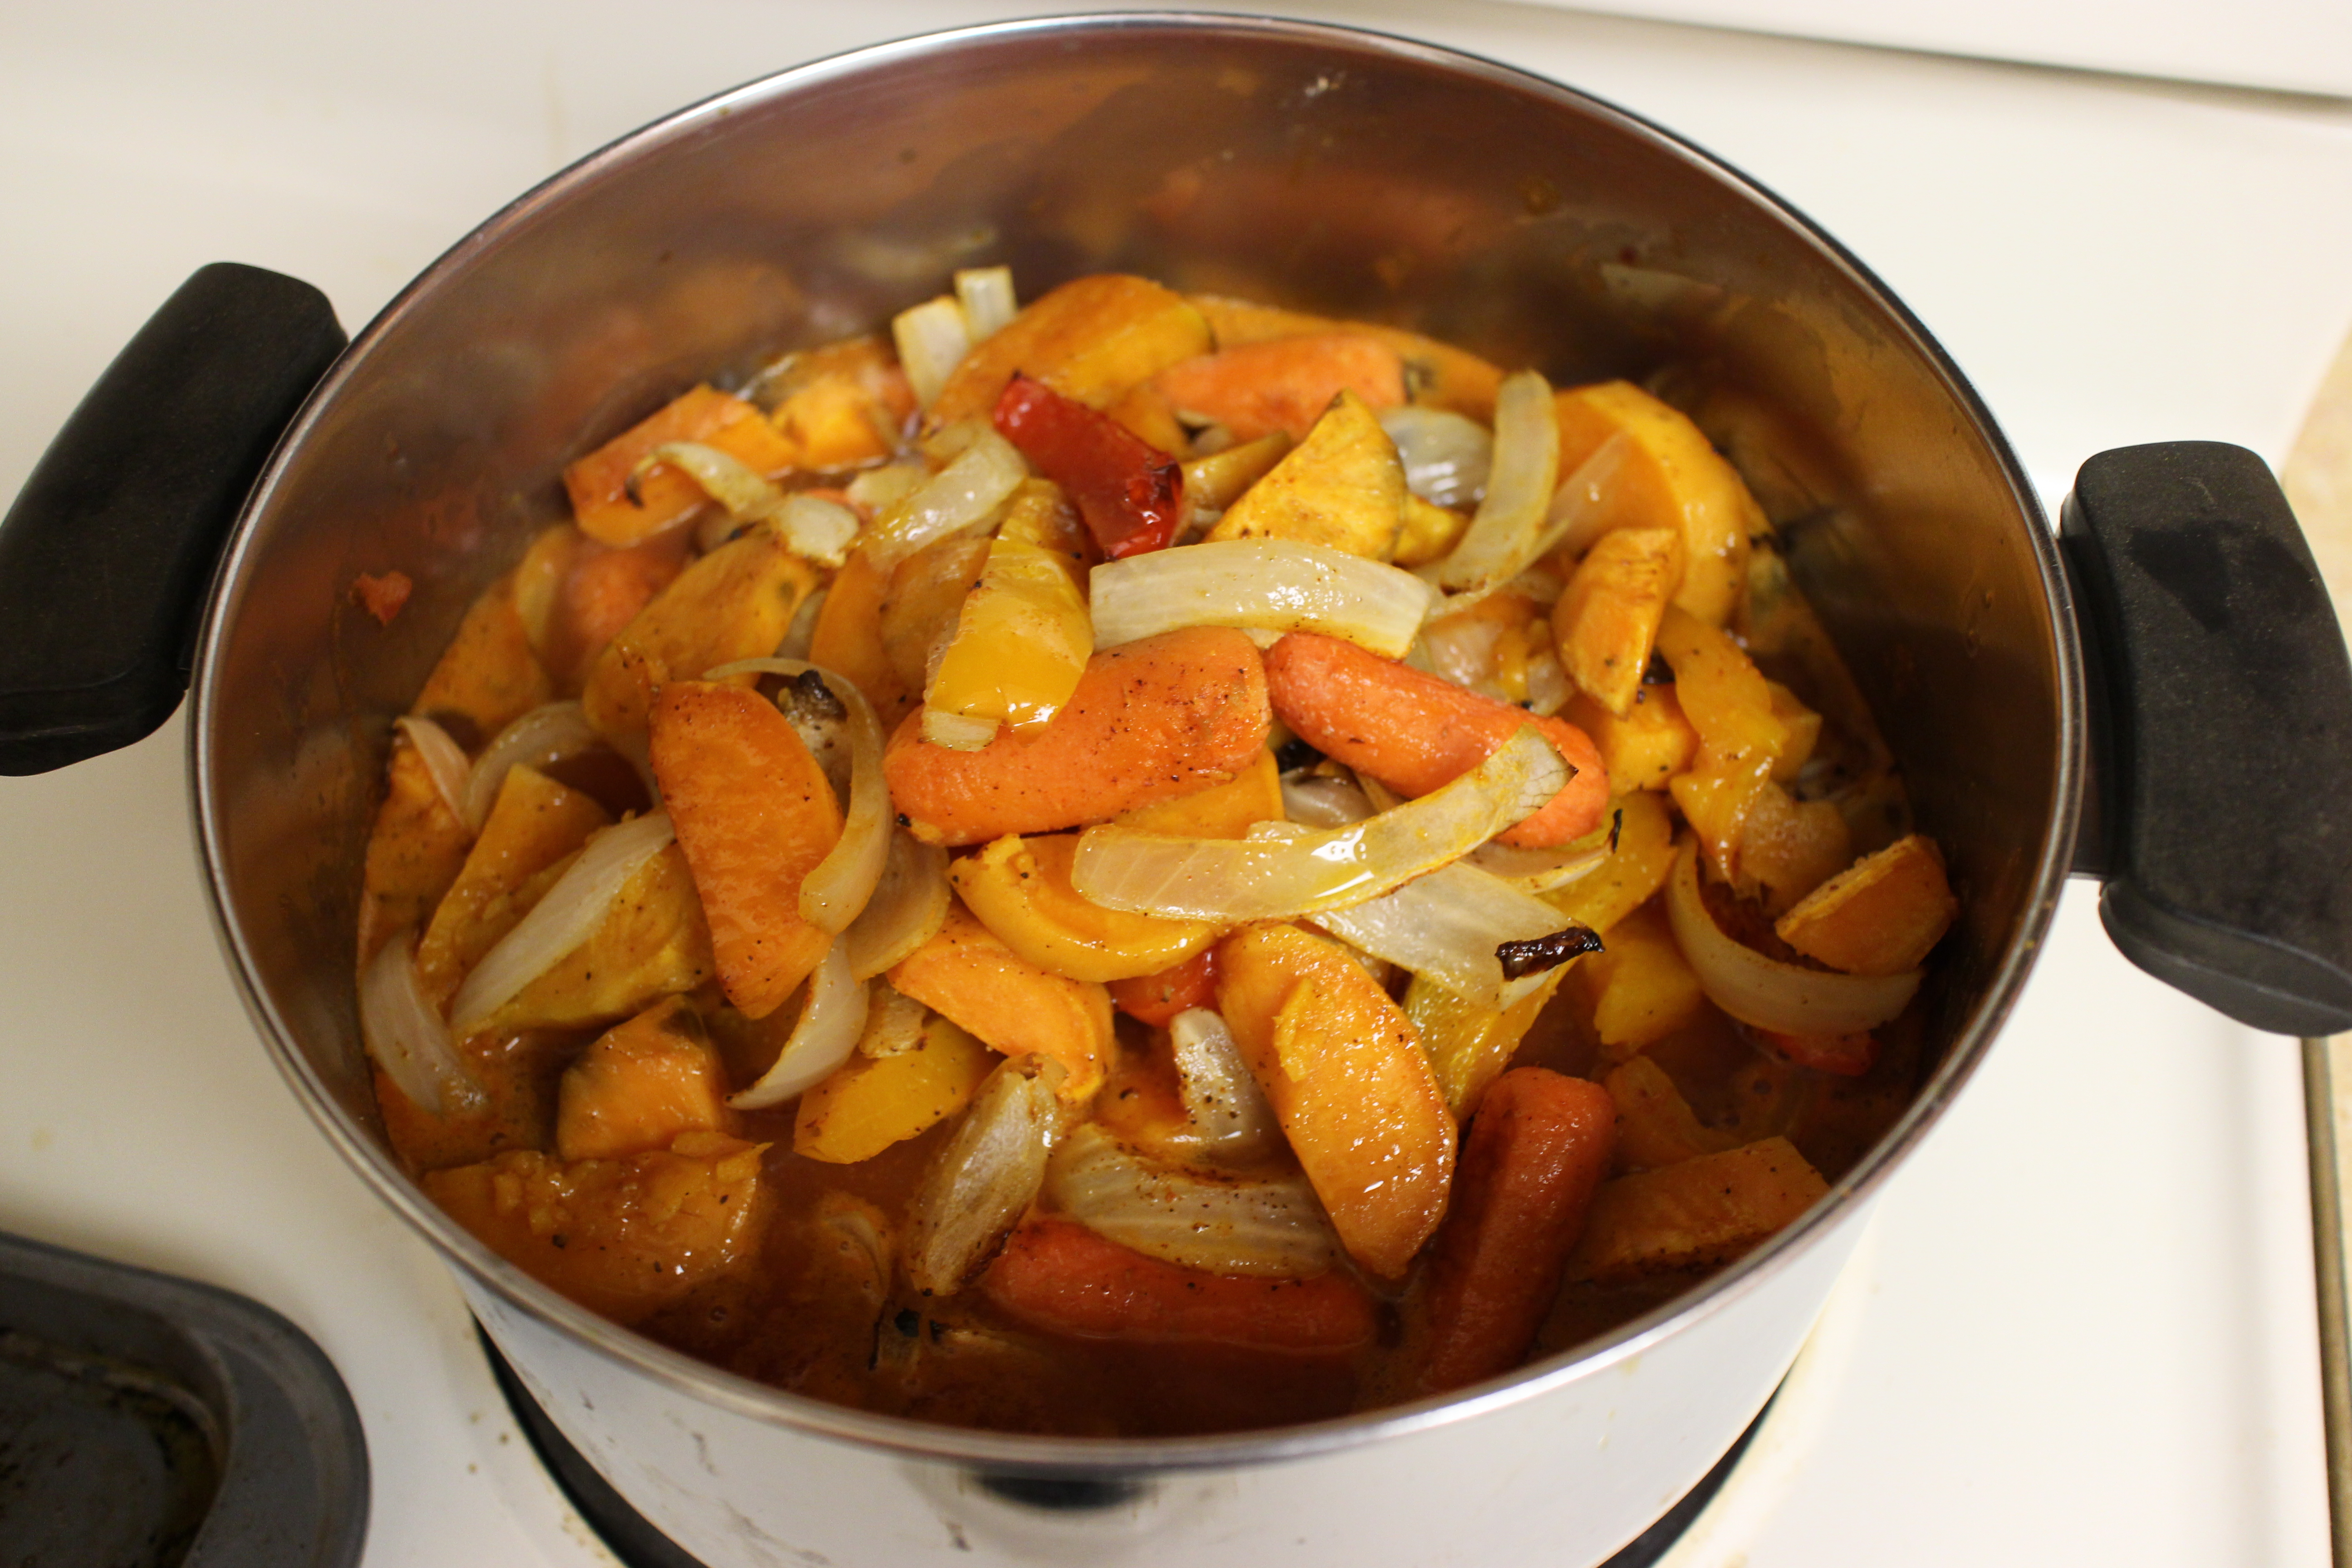
– Give everything a generous stir, then pop the lid on and let everything hang out together for at least 5 minutes but longer if you want those sweet potatoes to get falling-apart decadent!

IMG_1740

– I left mine on the lowest stove-top setting for about 30 minutes. I no doubt would have gotten impatient and served it up sooner but Chet was stuck in traffic. If you have the time, cook it longer! It turned out perfect and the vegetables were divine.

– Serve it up in a big bowl and go for it! We had ours with some multi-grain bread (perfect for dunking) but cornbread or biscuits would also be yummy. Enjoy!

IMG_1742


What do you make for dinner on dark December nights? Do you like cozy, comfort food? Would you give this recipe a try? I want to eat it again and again!!! 

Christmas crafting with corks!

IMG_1713

Even with the tropical temperatures I’m in quite the Christmas spirit this year, you guys. I’ve been deckin’ ALL of the halls. I’ve also been feeling a compulsive urge to buy random craft supplies. Sooooo….gotta make like an elf and get to work! Here are a few snaps of my latest crafting endeavor. If you, too, have a few corks tucked away in a jar somewhere, PULL ‘EM OUT! This is how I used mine…

I rifled through my craft box to see what sort of supplies might be useful…

IMG_1697

…and came up with these! Little pom poms and push pins make perfect “ornaments.” Twine can be used to turn your little trees into ornaments. And those foam stickers in the center were a Dollar Tree find (and the ones pictured are just a FRACTION of the amount that came in the bag). I used the E6000 glue to attach my embellishments but ended up using my trusty glue-gun to connect all the corks.

IMG_1699

I made one little guy as a stand-alone tree to nestle onto a shelf on our TV stand. I love how the colors come out different on each type of cork. How cute is that gingerbread man?

IMG_1702

And I made another to hang on our  tree. For this one I included a tree stump by cutting a cork in half (with a kitchen knife and a cutting board…livin’ dangerously!) and adding a bit of ribbon for embellishment. I also secured some twine below the top cork for hanging purposes.

IMG_1705

I’m totally in love with them and think they have the perfect rustic look. They’ll also look totally different based on what you have on hand! So give it a try! It was a super simple and cozy evening activity.

And c’mon, don’t you just love an excuse to drink more wine this time of year?!

IMG_1720

What sorts of ornaments do you hang on your tree? Do you make your own or do you stick to store bought baubles? Does your tree have a theme? I’d love to hear! 


Recipe: Tropical Chia Pudding

IMG_1667

For the last several years my breakfasts have consisted of one of two options. Hot outside? Yogurt. Cold outside? Oatmeal. I love both options a whole bunch and find them incredibly versatile. So many possible toppings!

But, don’t let that blurred Christmas tree in the background of the shot above fool you. Christmas may be fast approaching but it is still in the 80’s down here in South Florida. Meaning, I’ve been on the yogurt train for a few too many days straight. Time to mix it up!

Since it IS the week after Thanksgiving, my focus is on light & healthy eating…just for a quick recharge before I start gorging myself again in honor of the next holiday. With that in mind, I cast my focus on the nifty lil chia seed. These guys pack more Omega 3 fatty acids then salmon, contain more fiber than flax, pack a serious protein punch, are calcium rich, AND have a whole bunch of helpful vitamins and minerals. So, in an effort to fully lean in to the weird weather juxtaposition of a tropical holiday season, I give you the Tropical Chia Pudding. And my yogurt can happily take the week off.

What you’ll need…

IMG_1659

– 1 1/2 cups of coconut milk

– 1/4 cup of chia seeds

– 1 Tbsp of your preferred sweetener (I used Stevia but you could use honey, agave syrup, sugar or whatever you like.)

– 1 Tbsp of coconut flakes + more to top

– chopped fruit to top (I used mango but you could use pineapple, papaya, kiwi, etc.)

and how it all comes together…

– Put everything but your chopped fruit into a pot, combine, and bring to a boil.

IMG_1662

– Lower the temperature and allow the mixture to simmer for about 18 minutes, stirring occasionally to make sure the seeds aren’t sticking to the bottom of your pot. It should reach a pudding/porridge consistency.

–  Take your pot off the heat and allow to cool for several minutes.

– Divide the mixture evenly between 4 containers.

IMG_1670

– Top each jar with chopped fruit and a sprinkling of more coconut flakes.

– Store in the refrigerator (for no more than a week) and pull out a jar to enjoy for breakfast, snack time, or a healthy dessert!

IMG_1666

What do you normally eat for breakfast? Have you ever tried chia seeds? I love making chocolate puddings with chia, almond milk, and cocoa powder if you’re looking for another way to enjoy this healthful ingredient! 

Dollar Tree DIY: Simple Thanksgiving Centerpiece

dollar tree diy

With Thanksgiving fast approaching, I thought I’d share a super simple way to make your table a little more special on the big day! On Saturday I had a poke around our local Dollar Tree for craft supplies. (If you love crafting, scrapbooking, DIY home decor, etc my biggest money saving tip is to check out dollar stores BEFORE shelling out beau coups cash at places like Michael’s.) With my materials in hand I couldn’t wait to get home and start throwing them together! If you’d like to dress up your table for Thanksgiving, check out what you have on hand. You may be able to use this tutorial as a guide to put together something similar. Then, when Turkey Day rolls around you can lay out some place-mats and cloth napkins, put on some sweet sounding music, and start serving up your favorite dishes. The perfect, classy aesthetic for an intimate and simple Thanksgiving feast!

Bonus: I fully plan on switching out the more autumnal looking flowers for Christmas-y ones (poinsettias maybe?) and rolling this little set-up straight through December!

Ok, enough chatting! Here’s how you can get a similar look for your Thanksgiving table…

What you’ll need: 

IMG_1628

  • a bag of clear glass gems
  • a couple fake flowers (Typically the fake flowers from Dollar Tree come all connected in a bunch of three. I cut these two off…and probably ruined a pair of scissors in the process since the stems are plastic covered wire. C’est la vie!)
  • tea light or small votive candle
  • glass vase
  • scissors
  • gold jingle bells (I picked up a bag of tiny ones and a bag or normal sized ones because I thought it would be more visually interesting. Not necessary.)
  • postal twine
  • coordinating ribbon (I used a roll of white with gold polka dots that I had on hand from a previous project.)

Not pictured because I was just making this up as I went–

  • E6000 glue
  • 2 jars (Mine used to hold pickles! You could use mason jars or whatever you have.)
  • 3 cups of dried lentils

And how it all comes together:

IMG_1633

Pour the glass gems and jingle bells into the bottom of the large vase and make sure they’re all mixed up.

Create a little hole in the center and nestle the candle down in all those shiny baubles!

IMG_1634

Measure out some pretty ribbon and two lengths of postal twine, all the same length.

Lay these three pieces together and tie them all around the top of the vase in a bow. I liked the layering look of combining the ribbon and twine together but you could use one or the other. OR include more lengths of both to bulk it up a bit. Up to you!

IMG_1640

I love how the glass stones and gold bells reflect off each other…and the more rustic bow balances out all that bling. I can’t wait to see how it looks when the candle is lit!

Because I ended up liking this vase as is (without including the flowers), I started grabbing elements from my kitchen to make a couple side jars. I glued the same ribbon around the middle of two pickle jars (They were well washed out. Don’t worry!) and poured some dried lentils inside to give the flowers something to stand up in.

IMG_1638

I thought the burlap flowers went nicely with the brown postal twine. There’s also a light dusting of gold glitter on these flowers that the camera didn’t quite pick up. So coordinated!

I placed the large vase in the center of my (smallllll) dining room table flanked by the two smaller jars. If I had a larger table, I would extend this tablescape out by picking up two of these glass taper candleholders from the Dollar Tree (which, side-note: LOTS of people were buying when I was at DT on Saturday. Thanksgiving preparedness, perhaps? Yes, I am a basket peeper.)and this 2-pack of white taper candles. Then I would scootch the little jars down and stick the candles in between. Voila! You could also wrap some fake greenery amongst the five pieces or sprinkle fake leaves.

For my tiny table, however, I’m loving this simple look.

IMG_1646

Do you plan on doing anything special for your Thanksgiving table? Have you ever found great craft supplies from an unlikely place? Would you consider creating a centerpiece like this one? Let me know in the comments below! 


Recipe: Dairy-free Crepes

Pancakes 1

So, these are sort of a cross between a more European style pancake and a good ol’ fashioned American pancake. They have a more neutral taste so the toppings shine but they’re still gonna fill you up. As a result, I’d say this is a stick-to-your-ribs sort of meal….but in the daintiest way possible. ; ) You’ll only need a couple. However, if you’re like me and you can never really own up to your pancakes limits, you might gobble down a few (too many) more. This recipe uses almond milk and oil (I used vegetable oil here but coconut oil works nicely, too) to stay dairy-free. You can also use gluten-free flour if that’s your jam. And if you want to up the protein on ’em, sub in some protein powder for a quarter of the flour. Perfect weekend brunch feast or breakfast for dinner fare. Or if you work from home like me, you can whip them up for lunch in the middle of the day and enjoy a nice break from the grind!

What you’ll need…

– 2 cups flour

– 1 tsp vanilla extract

– 1 1/2 cups almond milk

– 3 Tbsps oil

– 1 tsp baking powder

– 4 eggs

– cooking spray to coat pan

Pancakes 2

and how it all comes together…

– Mix flour and baking soda together in a mixing bowl.

– Add your eggs and then slowly stir in the milk.

– Add oil and vanilla extract and blend with a mixer or immersion blender until mixture becomes a thin consistency.

– Grease your pan and heat to medium high. Add your batter in 1/4 cup at a time and allow to cook for about 4 minutes before flipping.

– This will make around 10 pancakes. If you want to keep everything warm to serve all at once, pre-heat your oven to 200 degrees and place pancakes on a wire rack over a baking sheet as they come off the pan.

– Top with fresh fruit, Greek yogurt, pure maple syrup, or whatever you like best!
Eat Drink and Be Mary

Do you ever make pancakes? What’s your favorite topping? Do you make them on a cast-iron skillet? If so, I’m JEALOUS! 

Make a ZERO COST fabric pumpkin in minutes!

fabric pumpkin

Now that we live in Miami, seasons are sort of a thing of the past. When I peak out the window the October sunlight tricks me into thinking it’s gonna be downright balmy outside. No dice! Still in the upper 80’s and humid as heck. While this is certainly a plus for relaxing at the beach when everyone else in the country is bundled into three layers for tailgating, it can be a little difficult to get into the holiday spirit. With Halloween just around the corner, we wanted our apartment to feel appropriately autumnal. (And I really want Trick-or-Treaters to show up at the door!) One fun way of achieving this look ended up being too awesome NOT to share. Mainly because this particular decoration was made from items I had on hand AND took me less than 60 seconds to make. That beats purchasing some cheap, plastic knick-knack I’m gonna have to store OR WORSE…one that ends up in a landfill.

I’ll wager a guess that you have the necessary items to get started! Gather up whatever scarves, dish towels, or fabric you think would make a pretty pumpkin……

…..and a handy roll of good ol’ T.P.

Wrap a scarf or a piece of fabric around a roll of toilet paper to give it a bit more GIRTH.

IMG_1557

Wrap the desired exterior fabric around the roll vertically. If your fabric is quite thin you can thread it through the hole until you’re all the way around. Or, like I’ve done below, you can simply tuck the fabric in section by section on both sides.

IMG_1558

Once all the fabric is tucked and the whole thing is covered, just fluff and fiddle with the folds until you’ve reached your desired effect.

Admittedly, a cool looking stick from your yard would make the BEST stem for your pumpkin. (You could even paint it!) But those type of trees don’t really grow here so I took an alternative route — one that fully embraces my pumpkin’s past life.

IMG_1559

Yes, that’s right…more gifts from the T.P. gods. #TrashToTreasures

Now find a little home for your brand new pumpkin!

IMG_1556

IMG_1549

Make one or a ton. Stack two rolls on top of each other to make a tall pumpkin or add more center fabric to make a fat one! The possibilities are endless!!! And the best part? Once the season is over, you can take your little creations apart, tucking the materials back in their proper place and putting them to new use. Pretty cool!

P.S. I’m also a fan of these foam decorations (packs away flat when stored off-season) and a well-placed window cling for some spookiness. I may have gone a little crazy with the pumpkins. Oh well! *shrugs* One girl’s freshmen year dorm door dec is another girl’s first attempt at a tropical autumn.

halloween decorations collage

Cute Date Night Idea: Starring General Tso’s Chicken?!

the search for general tso

If you’re looking for a cute date night idea, may I make a recommendation? How about the documentary, The Search for General Tso, enjoyed alongside a couple cartons of Chinese take-out! Who WAS General Tso, and why do we love eating his chicken so much? The film explores the origins and ubiquity of Chinese-American food through the story of the world’s most iconic sweet and spicy chicken dish. A dish you’ll want to shovel in your mouth as soon as that first frame rolls, I promise!

Now, you may be thinking, “Beth, isn’t this just the equivalent of #NetflixAndChill?” In a sense, yes. But this stay-in-for-the-night date has a THEME and themes require THOUGHT. Don’t let your adorable evenings with the one you love get reduced to a hashtag! Just think ahead, call up your local Chinese delivery restaurant, and place an order (or two) for some General Tso’s Chicken.

Instagramming a cute shot with your chopsticks is totally optional. #NetflixAndTso

Have fun, love birds!!! 


P.S. I just set up my very first READER SURVEY! Would you please consider answering a few questions for me? I would super appreciate the feedback and the opportunity to get to know you a little better! It only takes a minute and your feedback is totally anonymous. Thank you so much for your help and for stopping by Finding delight, it means the world to me! xoxo

Click HERE to go to the SURVEY. 

8 tips for settling into a new home.

8 tips for settling into a new home

At this stage of my life, I’m a veteran of the whole moving thing. I’ve moved around from crappy apartments to shared homes. From house-sitting gigs to back home with my mom. From sketchy neighborhoods to enviable ones. I’ve been moving, like a lot of folks in my peer group, for all my adult life.

Over the years, my approach to these moves has varied. There were times I left boxes packed, stacks of possessions strewn about with no dedicated area to call their home for the whole span of my lease. Moves met with detailed sketches of furniture floor plans drawn days before the moving truck showed up. Houses left stark and undecorated.  Apartments with pieces of art hung on every wall.

It’s easy to forget that moving to a new home is actually considered one of the top life-stressors that can trigger anxiety. With this in mind, I knew for my most recent move I wanted to take gentle care and a few precautions for settling into our new home with ease. Here are a few of the things I learned during the process of making our new house a HOME…

home collage 1

1. Start with the bathroom. There’s no way you can get your house looking exactly as you want it in 24 hours. There’s furniture to fuss with, frames to hang, and no doubt some bits and bobs need to be bought. However, getting one room to completion can boost your morale! You’ll no doubt need to *ahem* use your bathroom right from the start. So, focus your first purchasing and decorating efforts here. Once we arrived in Miami I immediately purchased a new shower curtain, bath mat, and waste-basket. My mom mailed me a bright new set of towels as a house-warming present. I then arranged all my necessities on the sink vanity and bingo-bango my bathroom was done!

2. Focus on areas where you’ll spend the most time. After the bathroom, direct your next efforts on the spots in your home that will see the most use. The bed is an easy one. Set it up. Make it! But maybe the rest of your bedroom isn’t as much a priority right now. Is sitting down to a table for dinner important to you? Need a cozy nook for knitting? Maybe you’re a fashion blogger who needs an organized closet and a full length mirror. For us, home work spaces were top of the list. We brought a lot of the necessities, furniture-wise, with us. Think: bed and kitchen table. But no desks. We focused our early attentions on these areas because, not only do we spend a lot of time at our computers, our jobs depend on it.

3. Cook dinner at home. It can be REALLY tempting while you’re in transition to eat out at restaurants a whole bunch. Resist the urge!!! Knowing you need to cook your own meals will force you to unpack those boxes of pots & pans and utensils, get them washed, and up in the cupboards. No need to reinvent the wheel. No shame if you must balance your plate on a moving box for a picnic on the floor. Focus on simple ingredients that come together easily. Nothing feels like home quite like where the FOOD is. Especially when that food is chicken soup, meatloaf, taco bowls, or spaghetti. *get in my belly* 

4. Give everything a proper place. The sooner you start unpacking all the, what I call- littles, the sooner you’ll be able to start chucking cardboard boxes in the dumpster. The sooner you start chucking cardboard boxes in the dumpster, the sooner you’ll start to feel like you don’t LIVE in a dumpster. Plan your storage solutions and start putting them to use. Stack your towels and extra bed sheets in the linen closet. Stow your basket of hair items in the cabinet under the sink. Put your vitamins in a neat little row in the medicine cabinet. And place your spatulas, spoons, and tongs in a kitchen drawer. Now I know, moving is EXPENSIVE. There may be furniture pieces you can’t buy right away; like a chest of drawers or your desk or TV stand. There may be littles that need to get tucked away into one of these eventual purchases. If that’s the case, stack them where you intend the new piece to go. They can hang out for awhile until you get the funds!

5. Let go of what doesn’t work. Sometimes you cart an item over MANY state lines only to realize it doesn’t have a place in your new abode. Chuck it! (Like donate it or give it to someone who might be able to use it.) I brought along an over the door shoe rack with me to Miami that I’ve had since my VERY first apartment only to find out my closet closed by way of a pocket door. I’m not gonna hold onto the shoe rack for potentially years just because SOME DAY I might be able to use it again. It was time to let it go.

6. Shop your belongings before shopping a store. This is where you can start to get creative! Just because you used something one way at your old home doesn’t mean you need to replicate in your new home. Perhaps something is better fitted to a different room’s decor this time. Maybe that nightstand needs to take on a new life as a TV stand. Perhaps your cute coat hooks can become a place to hang pot holders by the stove. My old bathroom (straight out of the 50’s) had one of those built in toothbrush holders by the sink. Here, not so much. Not to worry. I dug out a gorgeous pottery cup that held fake flowers in my past living room and put it to work doing its new job.

7. Invest in consumables. I’m of the belief that unless you’re a MILLIONAIRE you should go about decorating and furnishing your home slowly. If not, you’ll blink and whoops your house looks fantastic but you’re flat broke. Find other (read: cheaper) ways to beautify your place through investing in meaningful consumables. Think: candles, fresh flowers, post cards, even STRIPEY STRAWS! They’ll make your home pretty without breaking the bank.

8. Create simple routines around doing things that make you happy. Once you start developing sweet rituals inside your new homestead it will be that much easier to associate what started out as some walls, windows, and a front door into a place you associate with comfort, family, and joy. For me this means; reading a chapter of a book each night after dinner, unrolling my yoga mat during breaks from work, and splashing around in the pool in the late afternoon each weekend. Your house will definitely feel like home in those moments you find time to do the things you love.

Anything you’d add to the list? Leave it below…

Piña Croix-ladas!

IMG_1248

Now that we live in South Florida I feel like tropical beverages are SUPER approps. Fruity and colorful drinks just seem to pair so well with views of palm trees (and lizards of various sizes–still getting used to THAT). But I’m not always real in the mood for whipping out a blender OR using up my perfectly good dessert calories on a mixed drink. Luckily, I found a happy medium that checks ALL my lazy girl boxes while also tasting spot-on like those delicious, over-priced Piña Coladas you can get at beach-side bars! My secret ingredient is La Croix sparkling water. This stuff is having quite the moment recently. And while I have found my self pretty addicted to the bubbly straight up (it’s such a good soda alternative!), I think it really shines when paired with a bit of alcohol. As do we all, amiriiite? Now I know the rest of you crazy kids, aka the folk who DON’T live waaay down here on the southern most tippy-tip of the U.S. map, are saying “But BETH…I just flipped my calendar to September soooo where’s the Pumpkin Spice drink? It’s Fall after-all!” To which I say, sure…saddle up to some seasonally themed apple or pumpkin alcohol all you want…but ONE day, when it’s a particularly dreary and desolate up there, and you desperately need to create your OWN sunshine for the day, you’ll have this little tropical number in your arsenal.  And oh how you’ll thank me.

IMG_1238

What you’ll need…

– White rum (you can also get pineapple or coconut flavored rum, if you like.)

– Pineapple juice (we went for a Pineapple Orange Banana medley this time around. More fruit, more fun.)

– Coconut flavor La Croix sparkling water

(Note: You can totally leave out the rum for an equally delicious mock-tail.)

and how it all comes together…

Mix equal parts of each ingredient over a ton of ice. Easy as that! Traditional Piña Coladas call for coconut cream which is certainly delicious but can taste a bit more like a dessert than a drink. The La Croix water gives the drink a much more refreshing feel. Garnish with a pineapple slice and/or maraschino cherry if you’re feelin’ fancy or if you’re trying to impress guests.

Pop in a stripey straw and enjoy the sunshine. Real OR imagined. CHEERS!

IMG_1262

IMG_1265

Would you try this drink, or do you already have a go-to cocktail for when you’re feeling a little tropical? 

DIY: Cork Wreath

trash to treasure

When I was really little I told my parents I wanted to be a recycling woman when I grew up. Now, in my defense, the work I thought was involved in this profession was a lot different than how you may perceive it. I thought recycling people were given trash and then recycled it into items more useful or beautiful. Literally turning things from trash to treasure. My family had a good laugh. I pursued other career options. Life went on. Yet, I’d like to think I held on to a little bit of that childhood initiative. I still feel the need to create something out  of what was otherwise, to someone else, nothing. Maybe that would explain why for months I’d been holding on to a shopping bag full of corks at the back of my closet! An old co-worker’s cast-off…”Will anyone use these for a craft or something?” *raises hand* *ponders how long she’d been adding to this collection, the ol’ Wino!*

The itch to create something from her collection finally struck and I thought I’d show ya how to make your own! I’d eventually like to make a framed cork-board completely out of wine bottle corks but it’s gonna take a lot of nights sipping ol’ faithful (Read: Yellow Tail Chardonnay and whatever’s cheapest Malbec) before we get there. In the meantime…

What you’ll need:

IMG_0933

  • fairly sizable collection of wine bottle corks
  • styrofoam wreath form (You can get these at any craft store but I’ve also seen them for sale at lots of other places, even Dollar Tree.)
  • hot glue gun
  • glue sticks
  • ribbons, fake flowers, buttons, burlap, or anything else you’d like to attach

And how it all comes together:IMG_0939Heat up your glue gun and get to work! There’s no real science here. Just glue the corks down in whatever arrangement you fancy, making sure to leave as little open space as possible for the inside of the wreath to poke through. If there are words, design, or cool details on a cork that you want to display, affix it prominently. This can be a great way to show off a cork that may have sentimental value to you. Think: the bottle you opened on an anniversary or the souvenir wine you brought home from a trip abroad. A few of the corks I used were visibly cracked and I thought that looked cool! If you don’t, hide them near the bottom.

Note: Depending on how your wreath form looks, you may want to wrap it in fabric or burlap before gluing down the corks. Use a long piece of fabric and continuously wrap until you reach the end. Glue the first and last edge down with your hot glue gun.

Once your wreath is completely covered in corks, you may want to add a little embellishment. I dove into my craft box to see what I had on hand and came up with some burlap, ribbon scraps, an old iron on transfer and a star charm. But you can use whatever strikes your fancy!

IMG_0941

Now, hang and enjoy!

Do you like crafting with cast-offs? What’s a collection you have that could be re-purposed into something useful or beautiful? Pinterest awaits you! And speaking of Pinterest–follow me! I’m always pinning the cool up-cycle projects I find.